Self-Setup
UBEE Modem
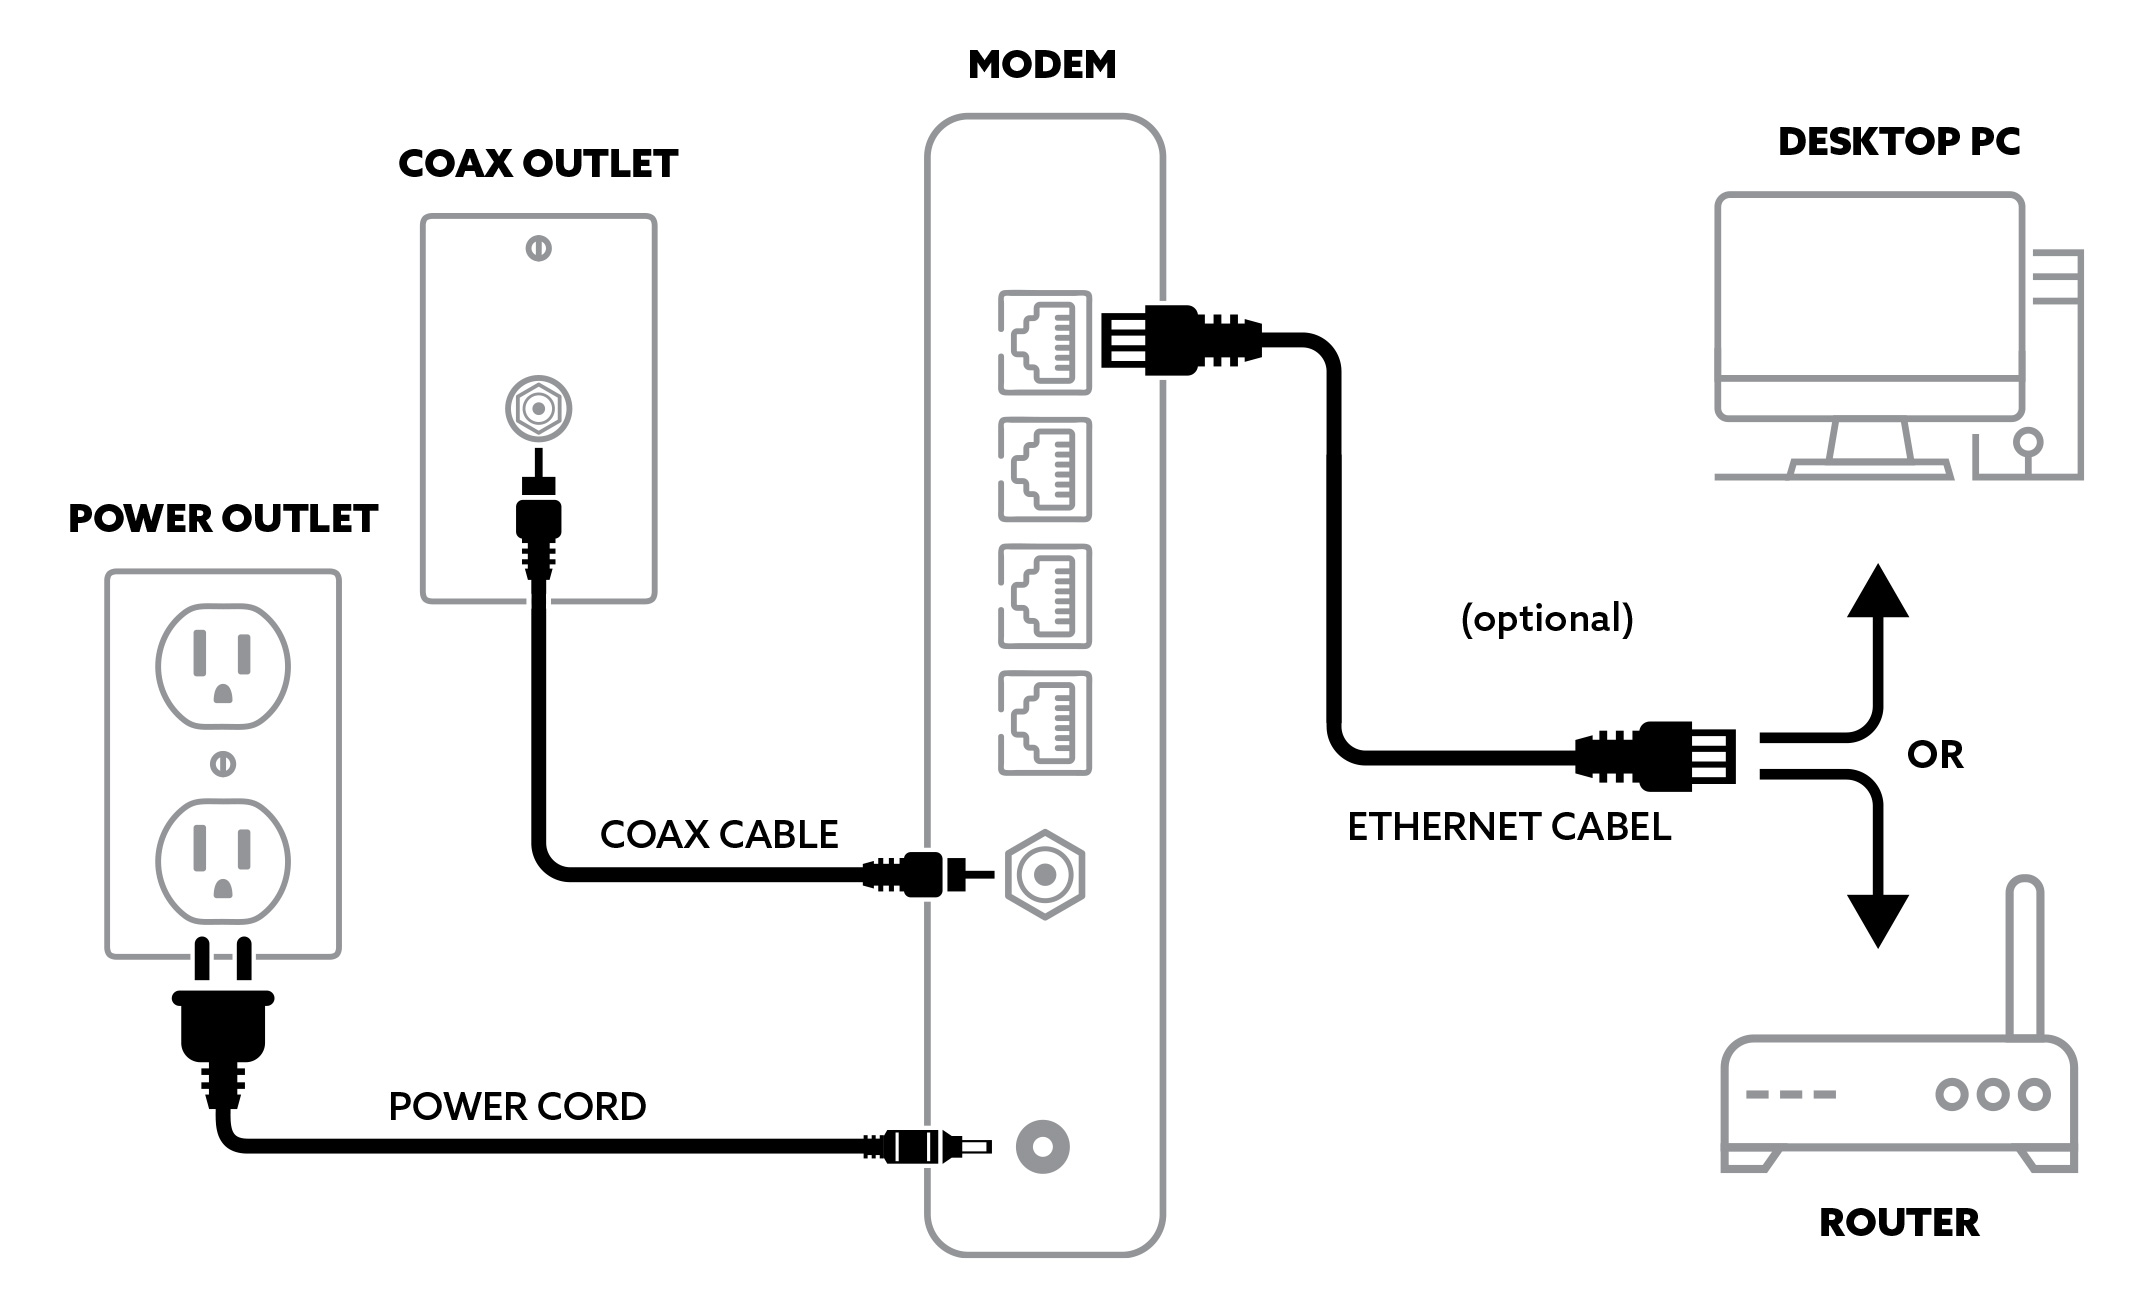
Modem Setup Diagram
Ubee Modem Step-by-Step Setup Instructions
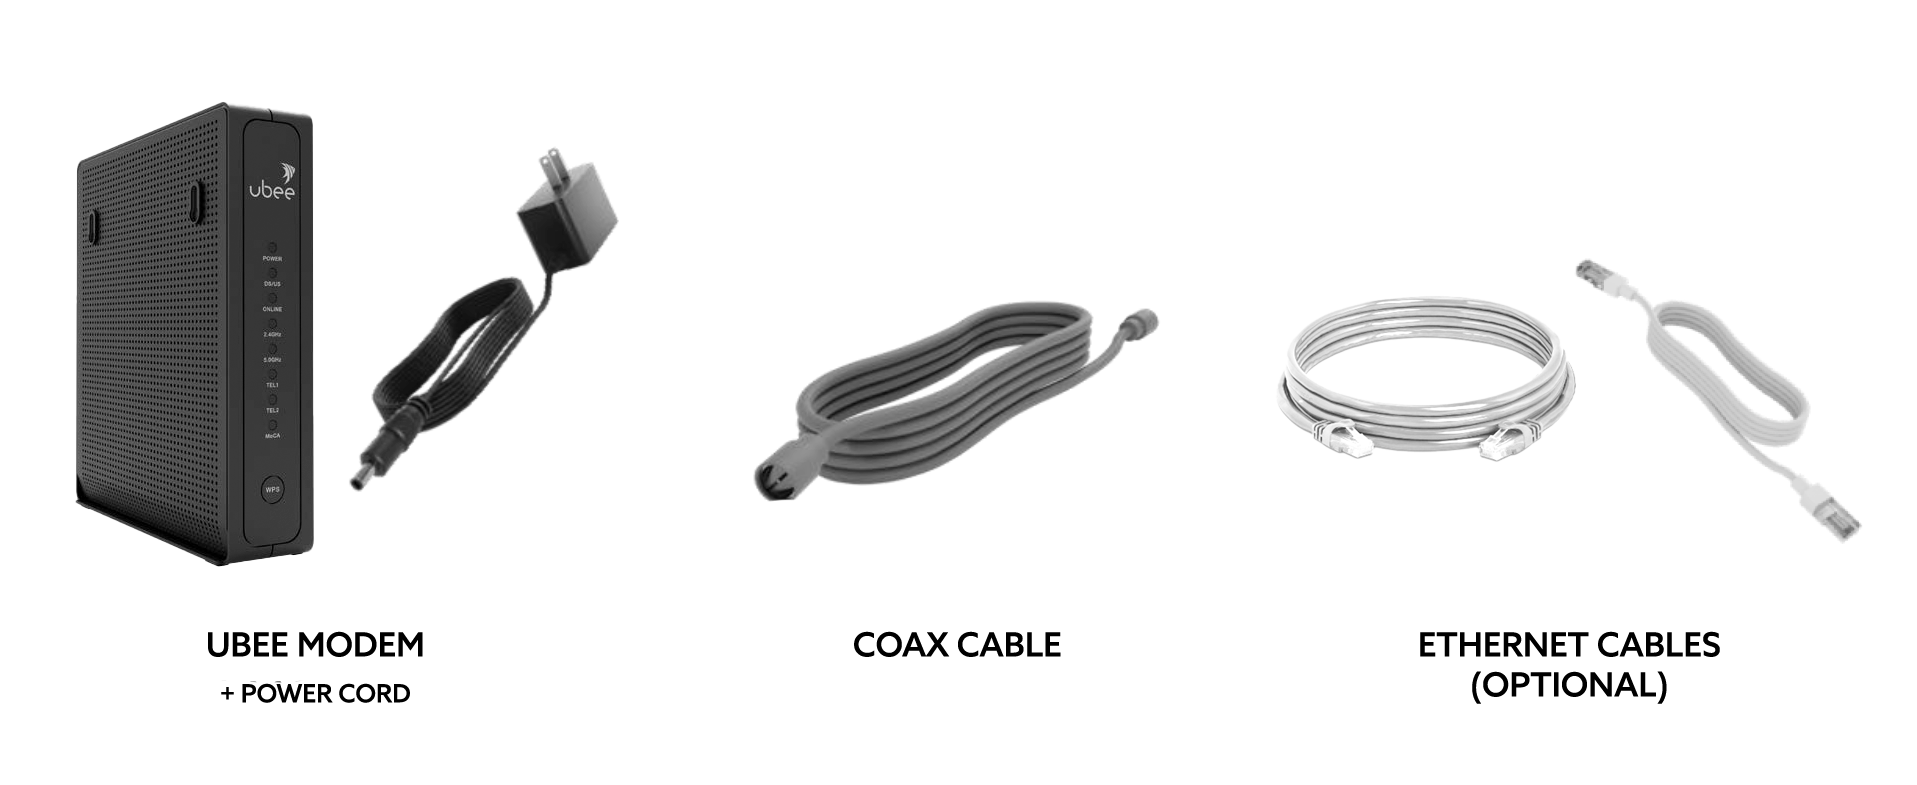
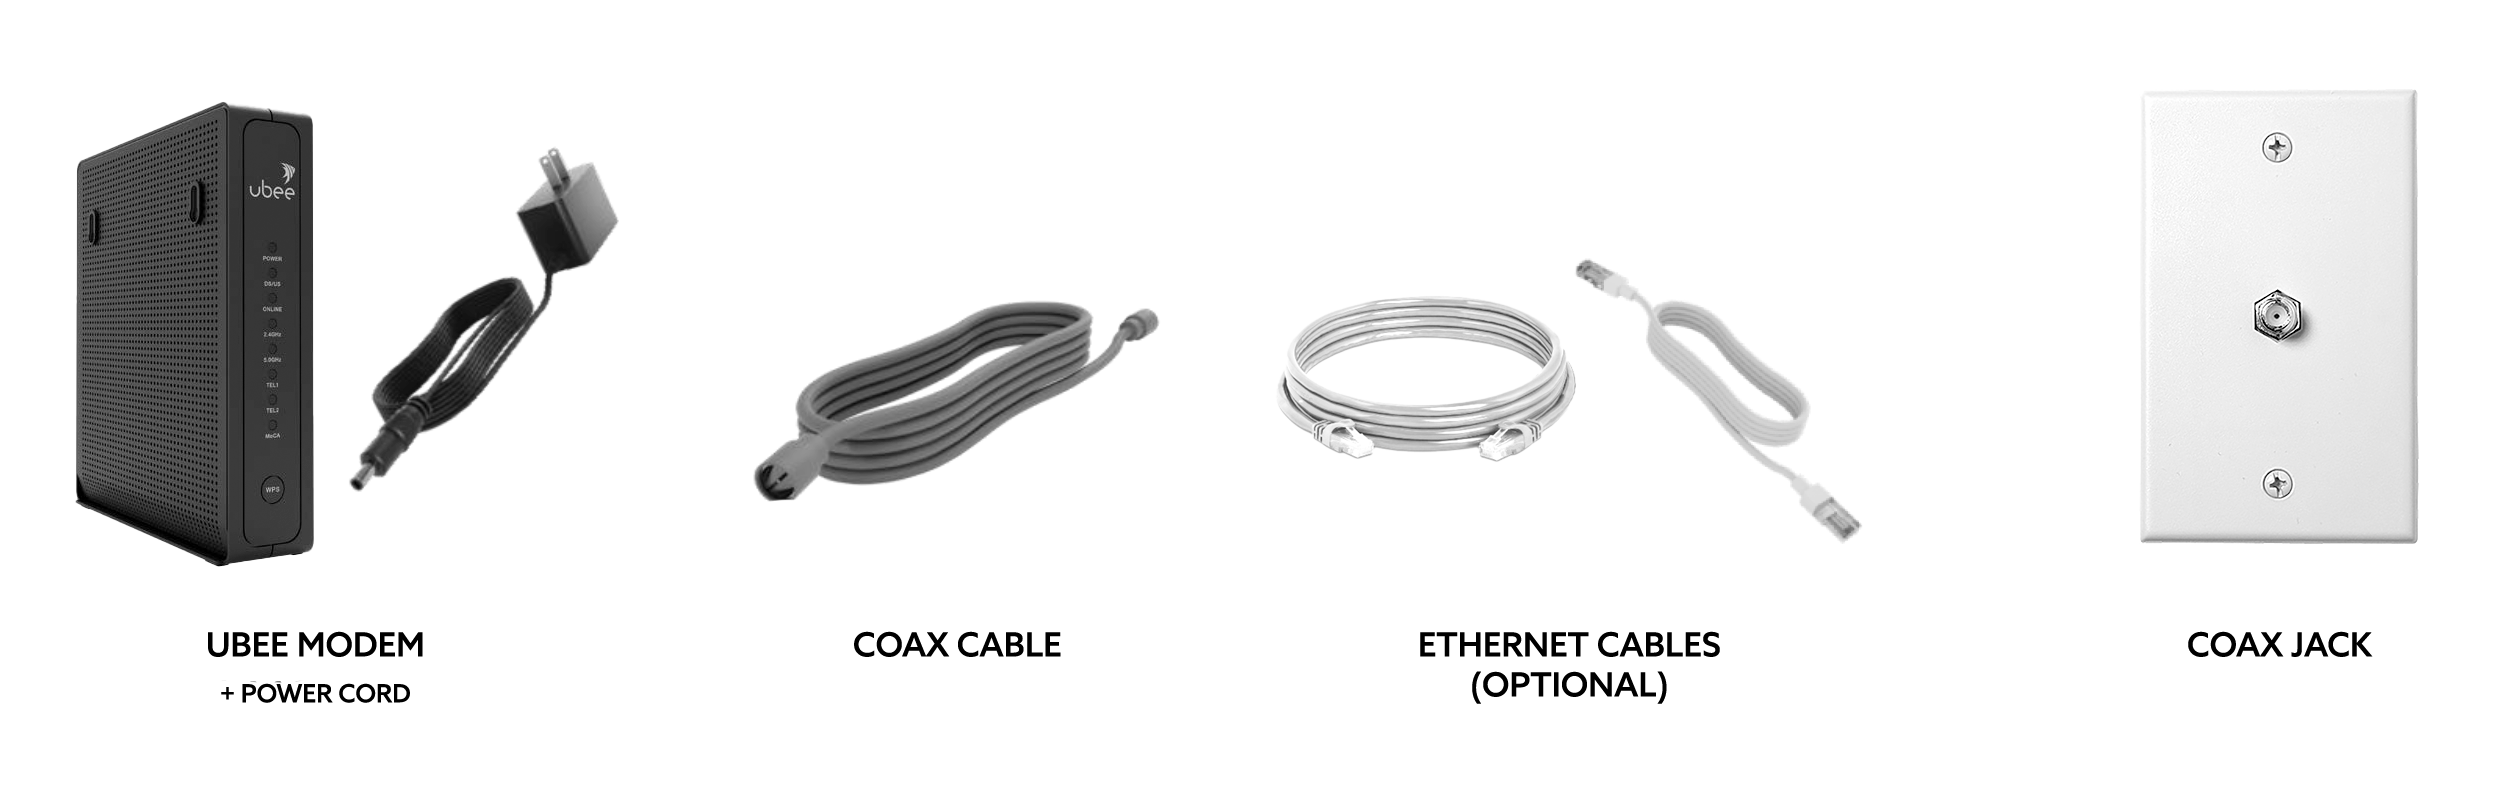
- Make sure you have all the necessary equipment and cables, as shown below (colors may vary). These items are in your TDS self-install kit.
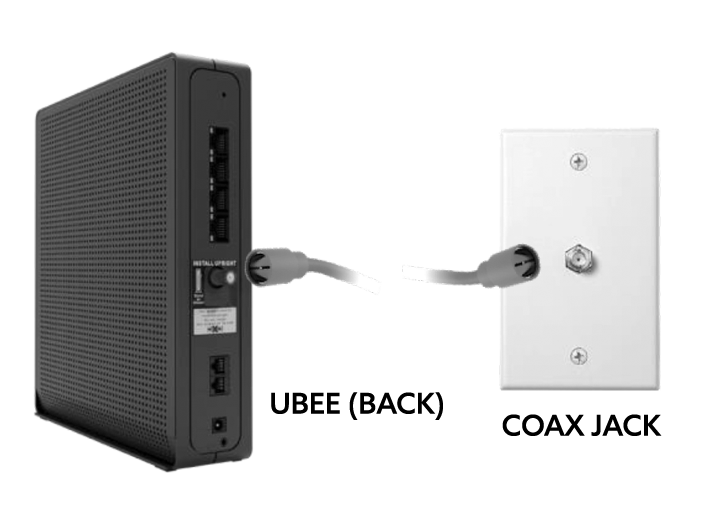
- Plug one end of the coax cable into your coax jack or splitter, and the other end into the coax jack on the modem, as shown. Turn the barrel to tighten the connections at both ends. Firmly hand tighten to avoid damaging the connectors. Need help finding the coax jack?
- Plug the power cord into the power port on the back of the modem, and the other end into an electrical outlet. This will start the booting-up process.
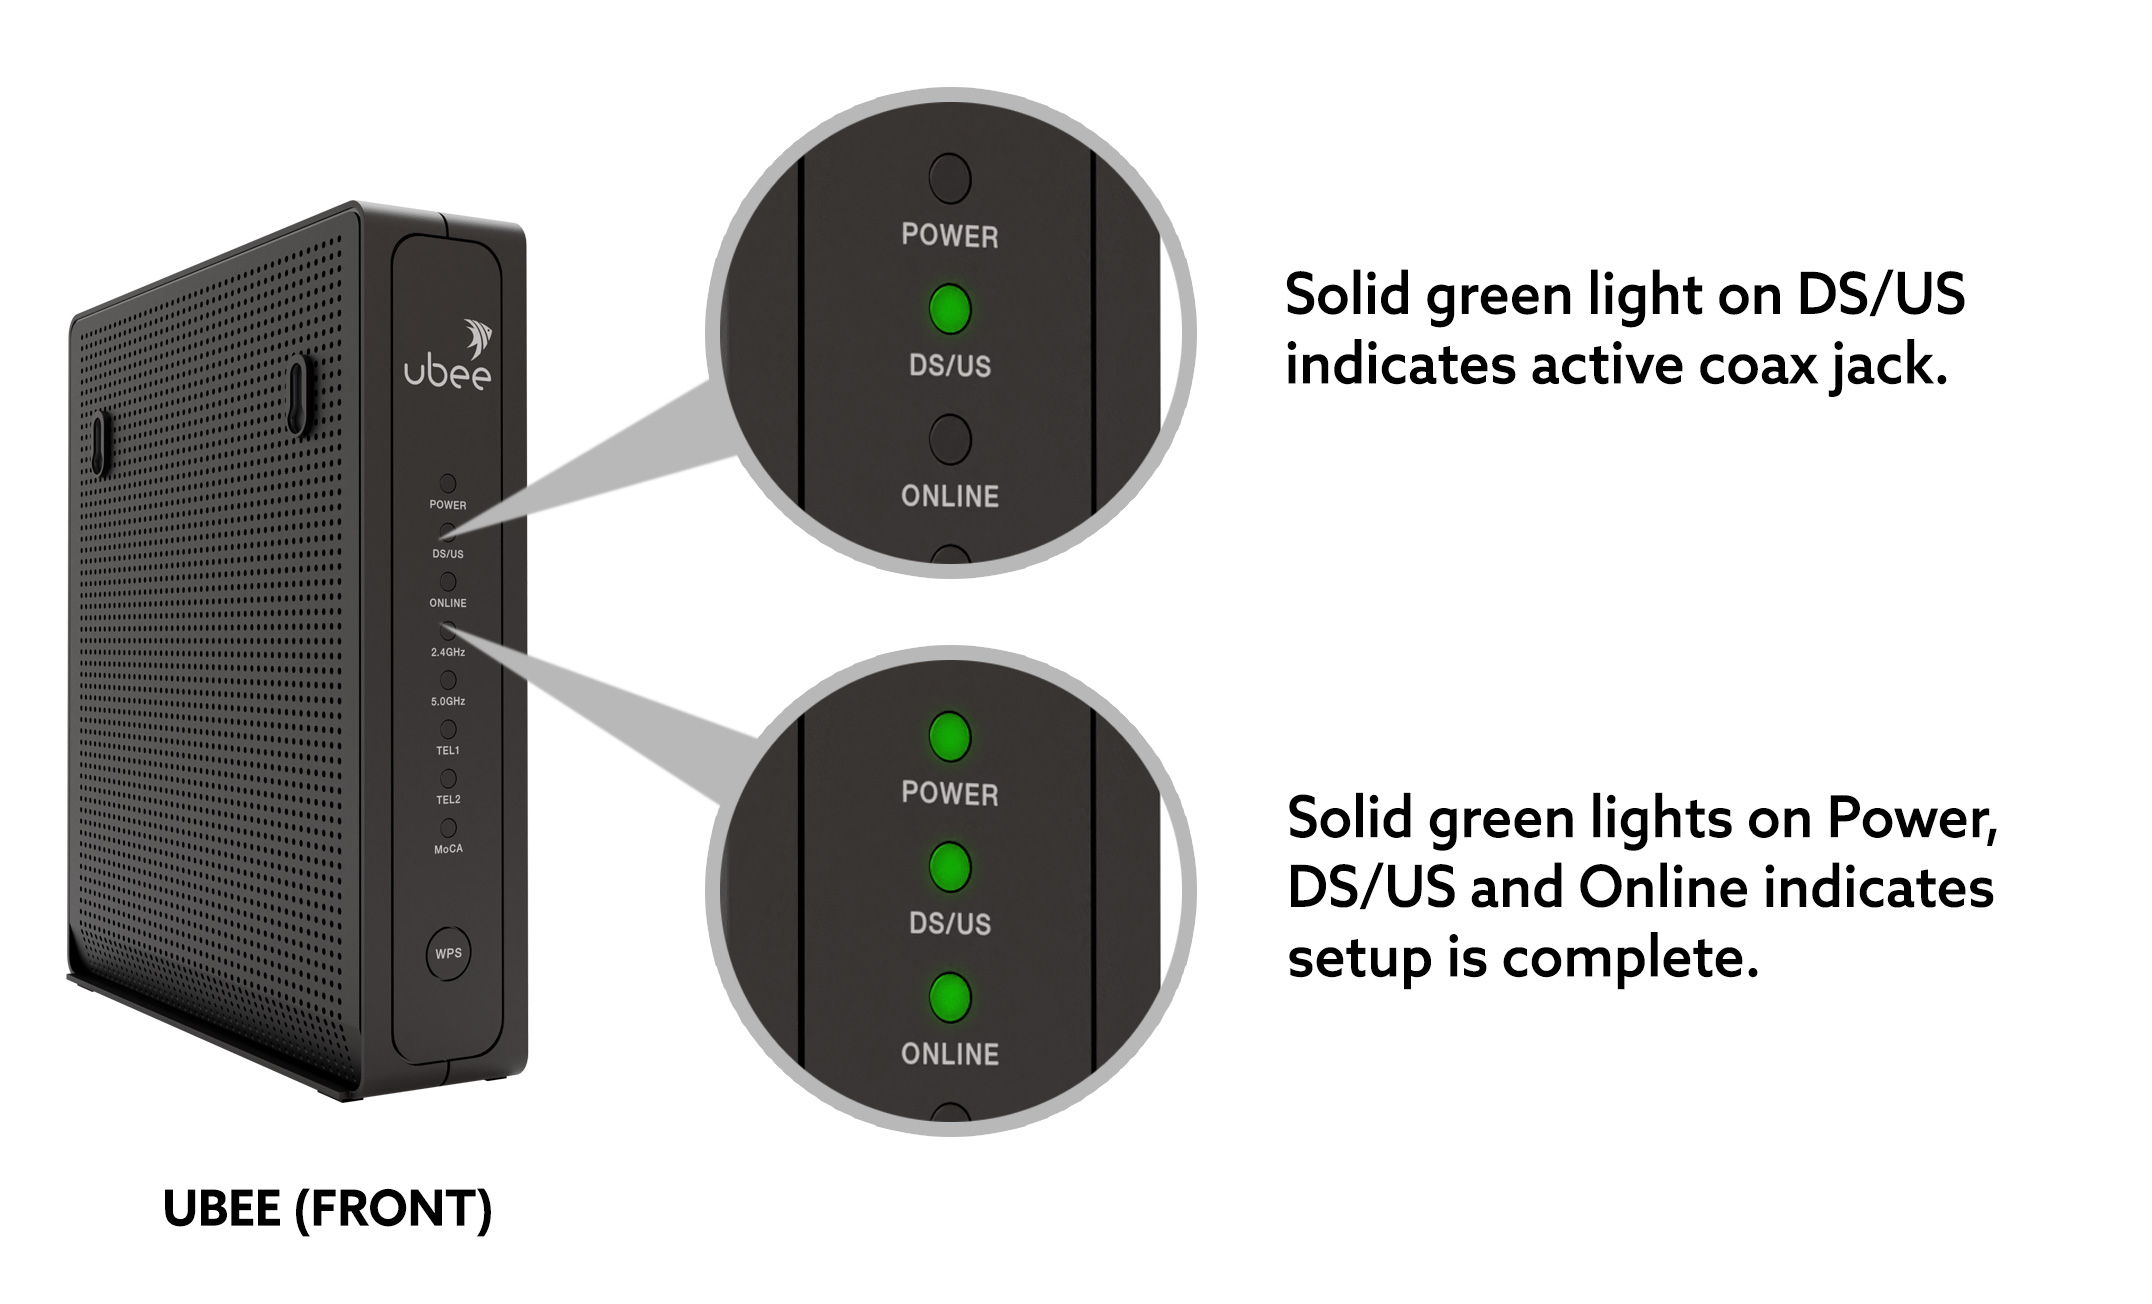
- Watch the lights on the front of the modem. You should see a series of flashing green lights. When the light labeled "DS/US" glows solid green (typically within 2-3 minutes), that indicates that you have found a coax jack activated for internet.
- When the Power, DS/US and Online light all glow solid green, setup is complete. This could take up to 20 minutes.
- If the lights don’t appear as described, make sure your coax connections are secure. Check that the power cord is connected. Check to make sure the power outlet works. If you were using a power strip, make sure it’s turned on, or try plugging into an outlet instead. If you still have no luck, try another coax outlet in the home.
- Your Ubee modem has a built in Wi-fi router. If you have been supplied an eero router, use these instructions instead. If you are using your own router, follow your manufacturer’s instructions instead of continuing this step.
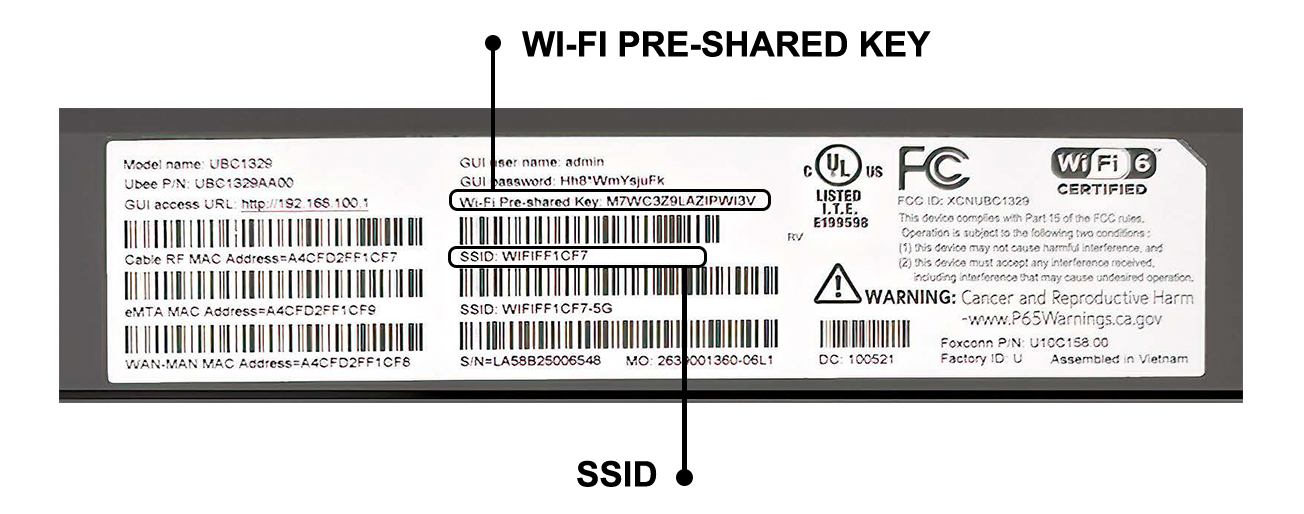
First, find the SSID (your Wi-Fi network name) and Wi-Fi Preshared Key (password) printed on the sticker on the bottom of your modem.
- Using your phone, tablet or laptop, navigate to the list of available Wi-Fi networks and select the one that matches the SSID on the sticker. Enter your password/preshared key. You should be connected and ready to browse the internet.
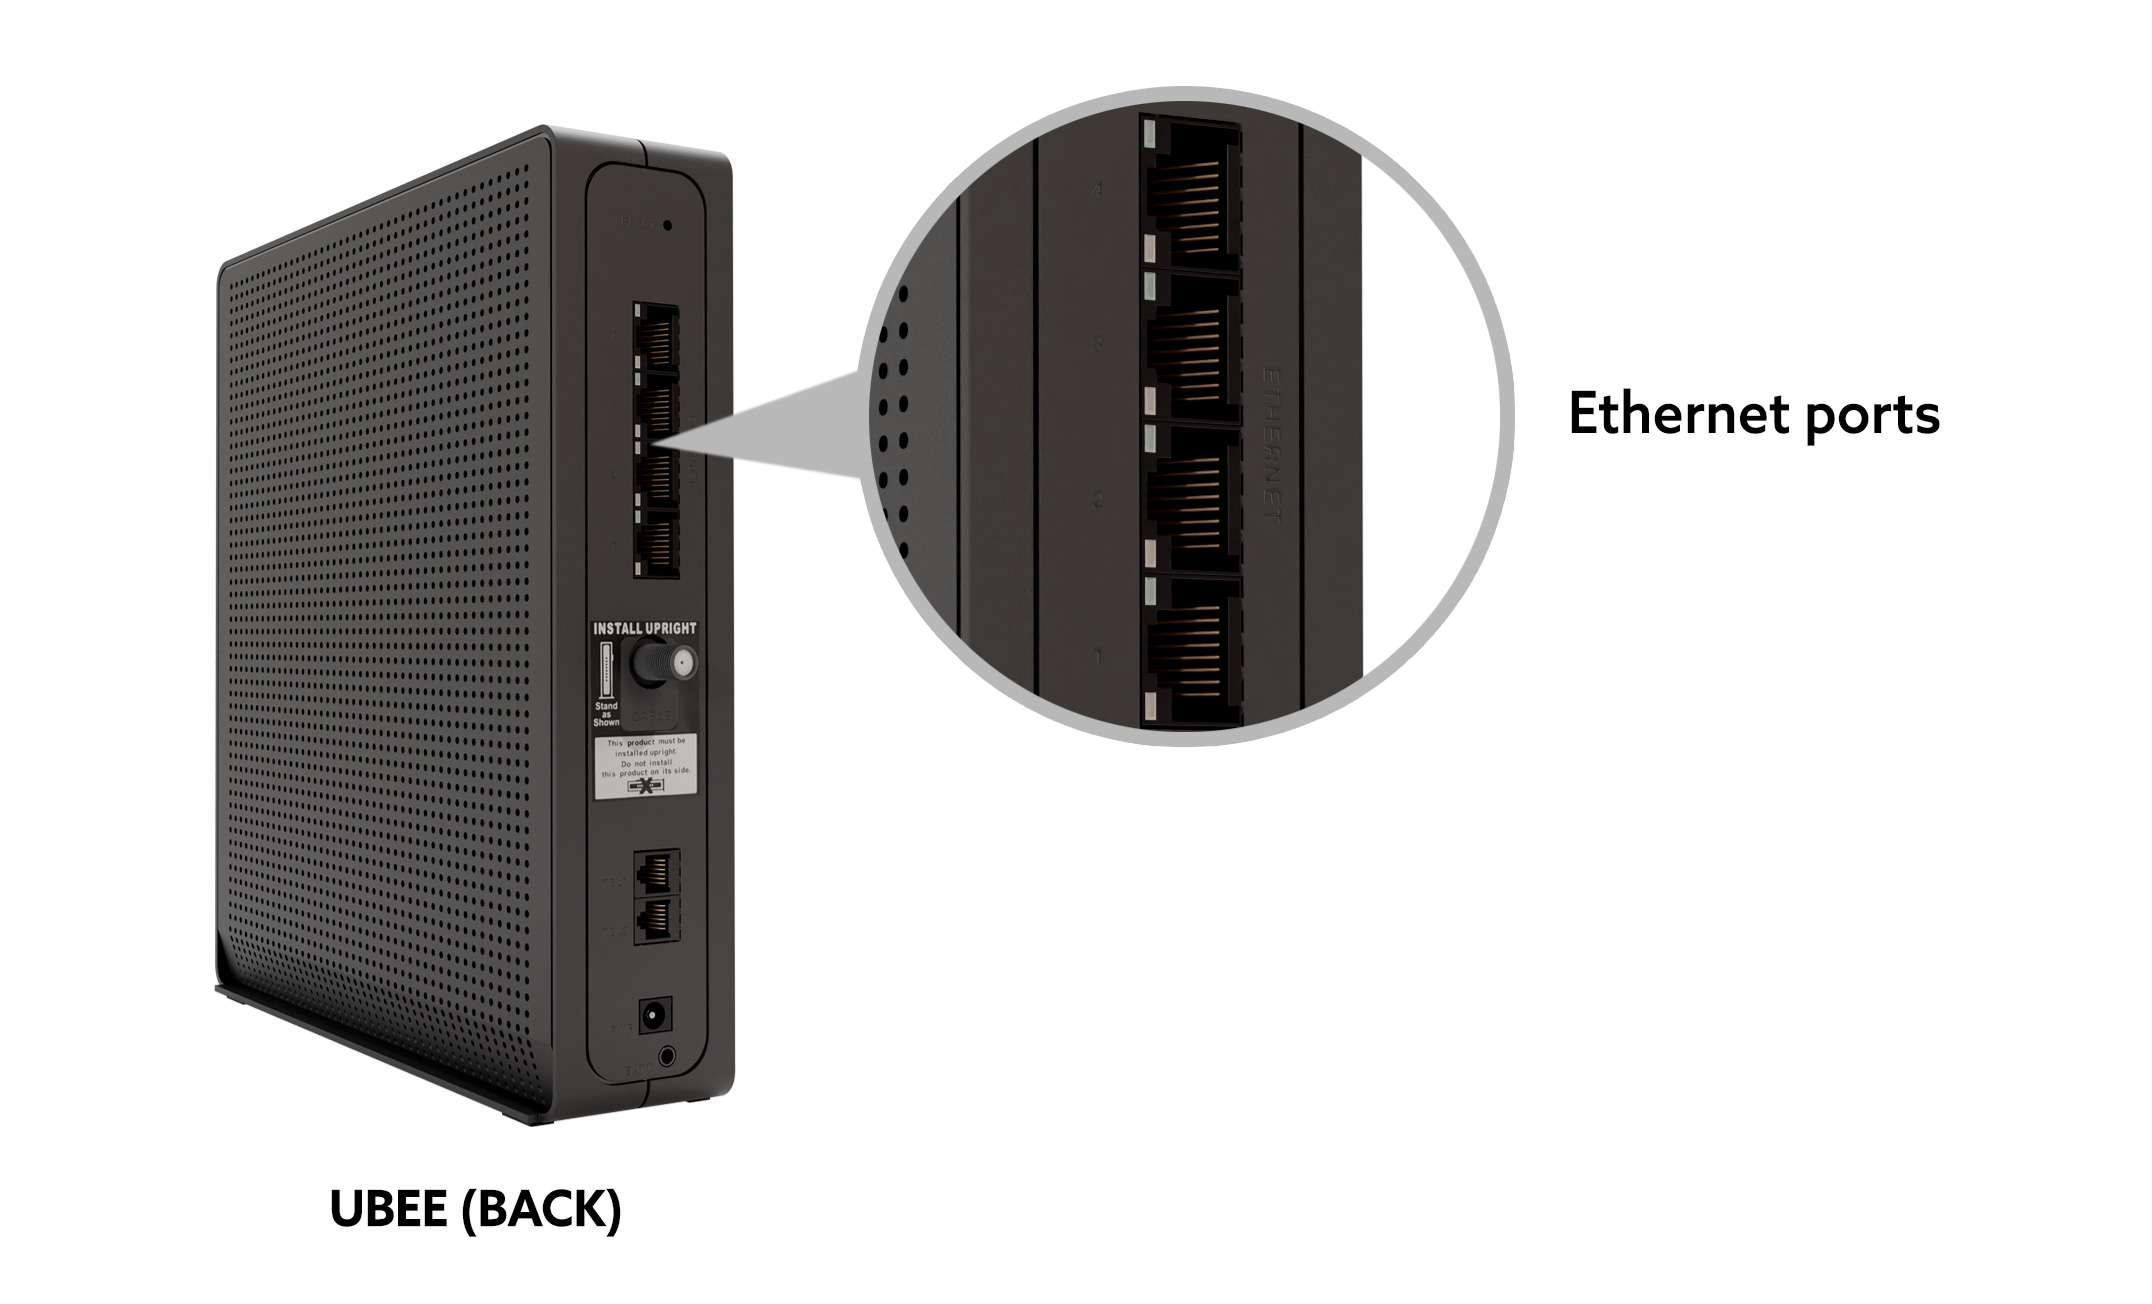
- If you wish to connect a desktop computer, game console or other device directly to your modem, connect them via an ethernet cable to the ethernet ports on the back of your Ubee modem.
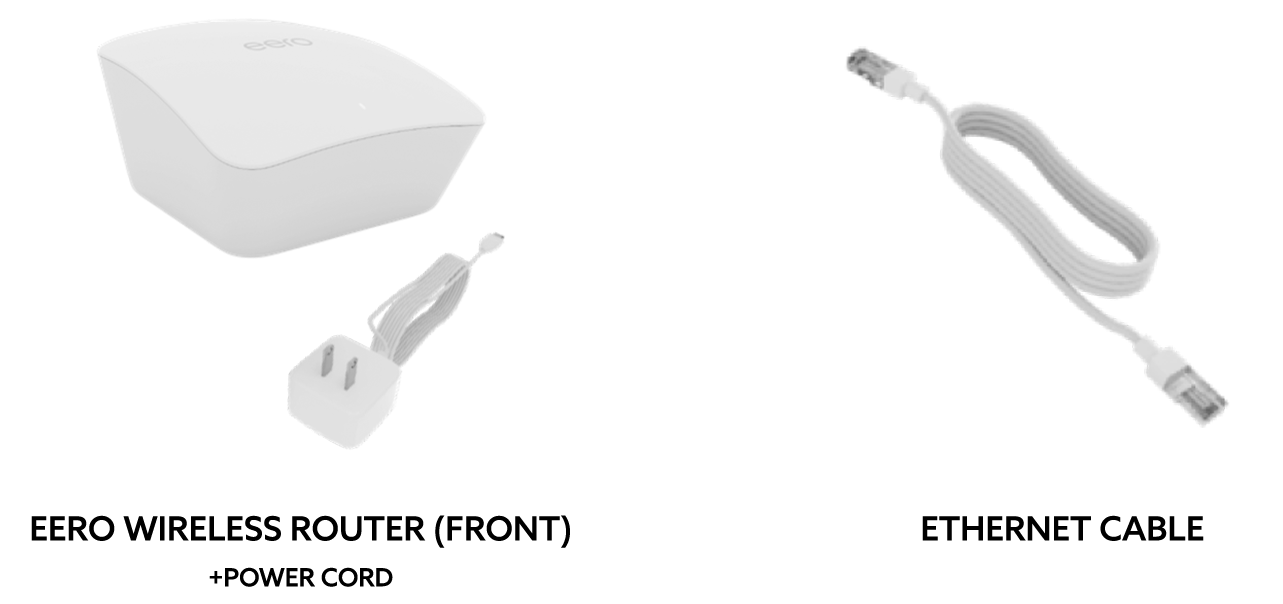
eero Wi-Fi Self-Setup Instructions
- Make sure you have the eero device and ethernet cable.
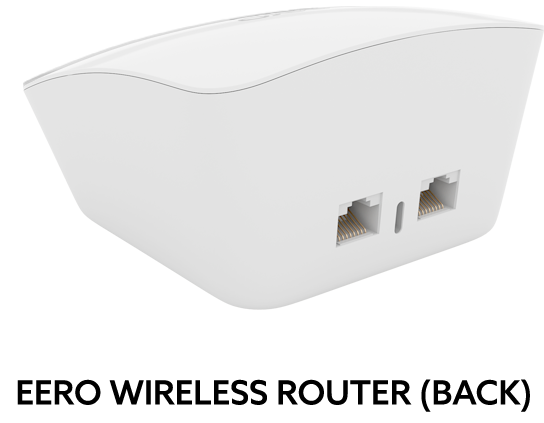
- Plug one end of the Ethernet cable into the first (or top) ethernet port on the back of your modem. Plug the other end into the left port on the back of the eero device.
- Using the white eero power cord, connect the eero router to a power outlet. The status light on the eero device should start flashing white.
- Download the eero Home Wi-Fi System app from your phone's app store and follow the setup instructions. The eero status light will blink blue while the app sets up, and will change to solid white when connected to the internet.
Coax Jack FAQs
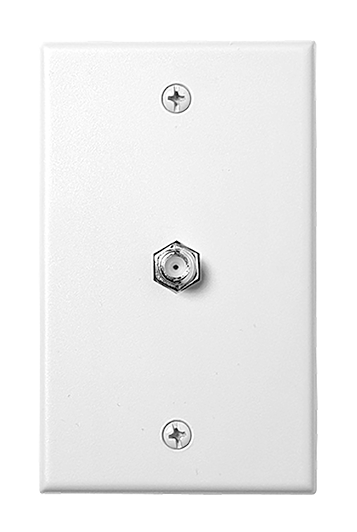
How do I find a coax jack that works?
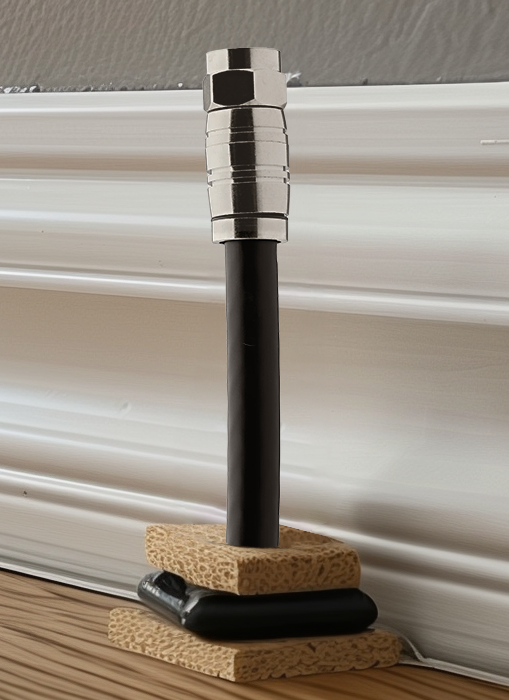
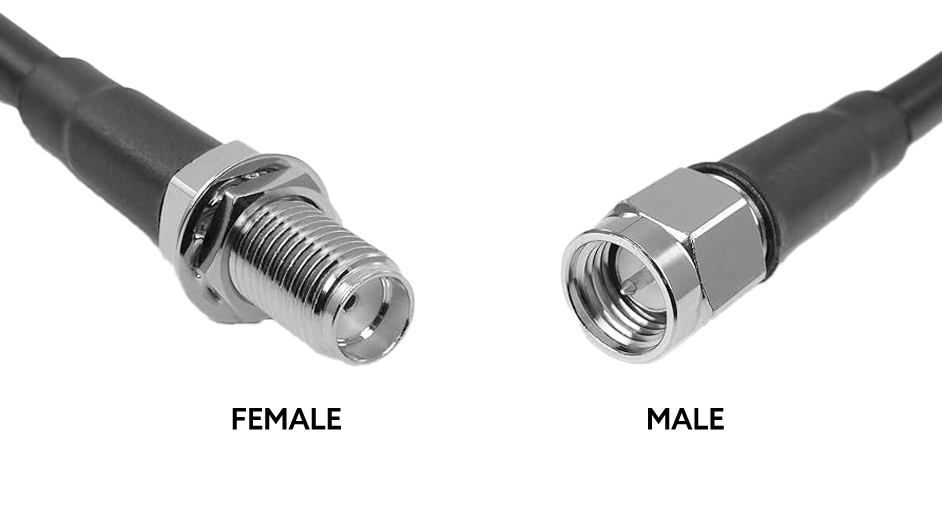
Some homes have coax cable coming out of the floor or wall, not enclosed in an outlet. If that cable has a male end, you could plug it directly into the modem. If it has a female end, you can connect it to one end of the coax cable provided in your self-install kit (coax cables supplied by TDS have two male ends).
What if I can find a coax cable but not a jack?
Coax jacks, or outlets, are installed in most homes built after 2000, and were initially used to deliver cable TV signals. Today they are also used for internet connectivity. Coax jacks are most often installed in the living room, office or den, but they can really be installed anywhere—even the basement or attic.
Unfortunately, not all coax jacks are set up to deliver internet. Finding the right one could take some trial and error. If you know which jack was used previously to connect cable tv or internet, try that option first.
How do I know if a coax jack is set up for internet service?
You can’t tell if a coax jack is activated for internet just by looking, you can only tell by trying to connect it to the modem. Once the modem is connected to both a power source and the coax jack or cable, watch the front of your modem for flashing green lights. Once you see the “DS/US” light glow solid green, that’s a sign the outlet is active. Setup is not complete until the Power, DS/US and Online lights glow solid green. Keep in mind that process can be complete in a few minutes but may take up to 20 minutes.
If you’ve tried multiple jacks without success, give our repair team a call at 1-888-CALL-TDS (1-888-225-5837).
I've tried multiple jacks and still no success. What now?
You can try other jacks or give our repair team a call at 1-888-CALL-TDS (1-888-225-5837).
General FAQs
What do I need to connect my Ubee modem?
You will need the modem, power cord, and coax cable. If you want to connect a device (desktop computer, game console, external router, etc.) you will also need an ethernet cable. Please note, cord colors may vary from what is shown here.
Where should I place my Ubee modem?
If you are using the Ubee with the built-in wi-fi router, it’s best to keep it in an open area, away from exterior walls, metal surfaces, microwaves and windows. If possible, avoid cramped spaces and anything that can block the device signal.
I need help with my eero Wi-Fi
To get help finding the eero app, or to modify settings, click here.
How do I connect my own router?
You will need to follow your wi-fi router manufacturer’s instructions to complete setup.
What do I do with the ethernet cable provided in my kit?
The ethernet cable is optional, in case you want to connect a desktop computer, game console or other device directly to your modem. The ethernet ports are yellow and located on the back of your Ubee modem.
How can I customize my Wi-Fi network name and password?
Before proceeding, please note that any changes you make to the router settings may need to be reset to factory defaults for remote troubleshooting purposes with the TDS repair team.
- Before you get started, find your GUI user name and GUI password, which can be found on the sticker on the back or bottom of your modem.
- You should also know what you want to change your network name and password to. Your network password field is alphanumeric and case sensitive, but cannot include spaces or special characters.
- Connect your preferred device (phone, tablet, laptop, etc.) to your modem via wi-fi or ethernet. Open a browser (Edge, Chrome, Safari, etc.) and type 192.168.100.1 into the address bar.
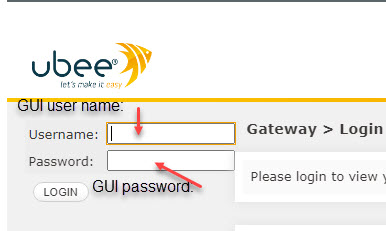
- When this page appears, enter your GUI user name and password and press LOGIN.
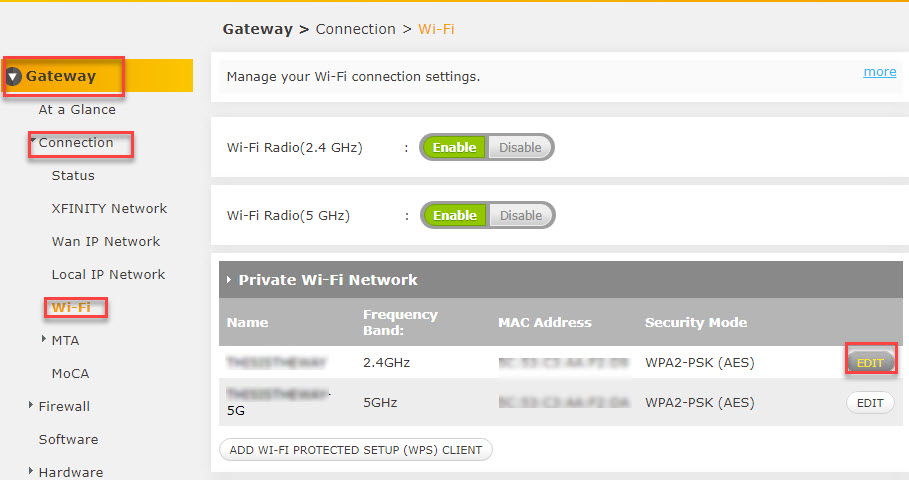
- From the navigation bar on the left, select Gateway > Connection > Wi-Fi > then click the Edit button for the 2.4 GHz frequency band.
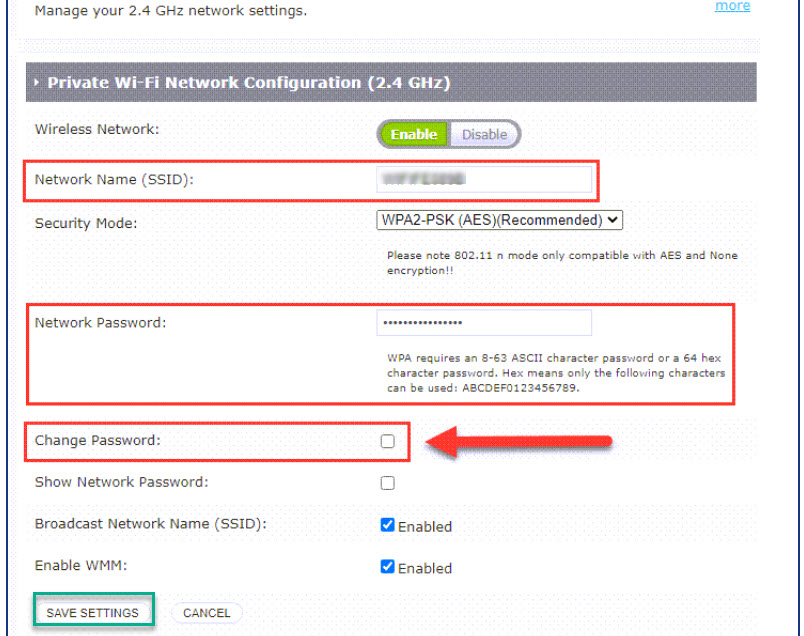
- A screen like this should open next.
Type in the Network name you want into the first field. It’s a good idea to keep 2.4GHz in the name. Type in the Network password you want into the next field. Be sure you also check the “Change Password” box, or your changes won’t be saved. Be sure to document exactly what you typed before you hit Save Settings. - Now, repeat the same steps for the 5GHz frequency band as well, as you’ll have better results with both options activated. You can keep the same password for both frequencies. Just be sure to include 5GHz instead of 2.4 Ghz in the network name so you can distinguish between them.
If you are connected wirelessly, you will first have to reconnect to Wi-Fi using the new credentials you just set.

If you experience difficulties with this process, please give us a call at 1-888-CALL TDS (1-888-225-5837).
Why are there 2.4 GHz and 5 GHz options in my network?
These represent different Wi-fi frequencies, which together cover a broad range of needs. In general, 5 GHz is faster but isn’t compatible with all devices, and the 2.4 GHz frequency is able to penetrate walls and solid objects more easily. Use the 5 GHz frequency where possible, but try the 2.4 GHz frequency if the 5 GHz frequency isn’t working.
